There’s something magical about desserts that come with a story—and butter mochi Hawaii is one of the best-kept sweet secrets of the islands. This chewy, golden, coconut-scented square isn’t just a treat—it’s a bite of aloha. Baked in home kitchens and passed down through generations, this Hawaiian favorite captures the heart of local culture in every bite.
In this guide, you’ll discover why butter mochi Hawaii is more than just dessert—it’s tradition, comfort, and joy, all wrapped in a crispy-edged, buttery bar. From ingredients to creative twists, baking tips to nostalgic stories, we’ll show you how to make it and make it yours.
Don’t miss our cozy twist on chocolate banana bread with cottage cheese—it pairs perfectly with Hawaiian-inspired bakes like this one.

Explore the Steps
What Is Butter Mochi? Why This Hawaiian Dessert Has Everyone Obsessed
A Sweet Blend of Cultures: Japanese Roots, Hawaiian Heart
So what exactly is butter mochi Hawaii style? Imagine a mix of Japanese mochi texture with rich, buttery flavor—and you’re close. It’s soft, chewy, and baked, not steamed. The base of this dessert is mochiko rice flour, giving it that signature bounce, and when blended with coconut milk, sugar, and eggs, it becomes a crave-worthy fusion of cultures.
Born in island kitchens, butter mochi in Hawaii has deep roots. It’s a staple at bake sales, birthday potlucks, and backyard luaus. Families often pass their own recipes down like heirlooms. And once you try a bite, it’s easy to understand why—this dessert hits all the cozy notes.
What Makes Butter Mochi So Addictive (Hint: Chewy, Buttery, Tropical)
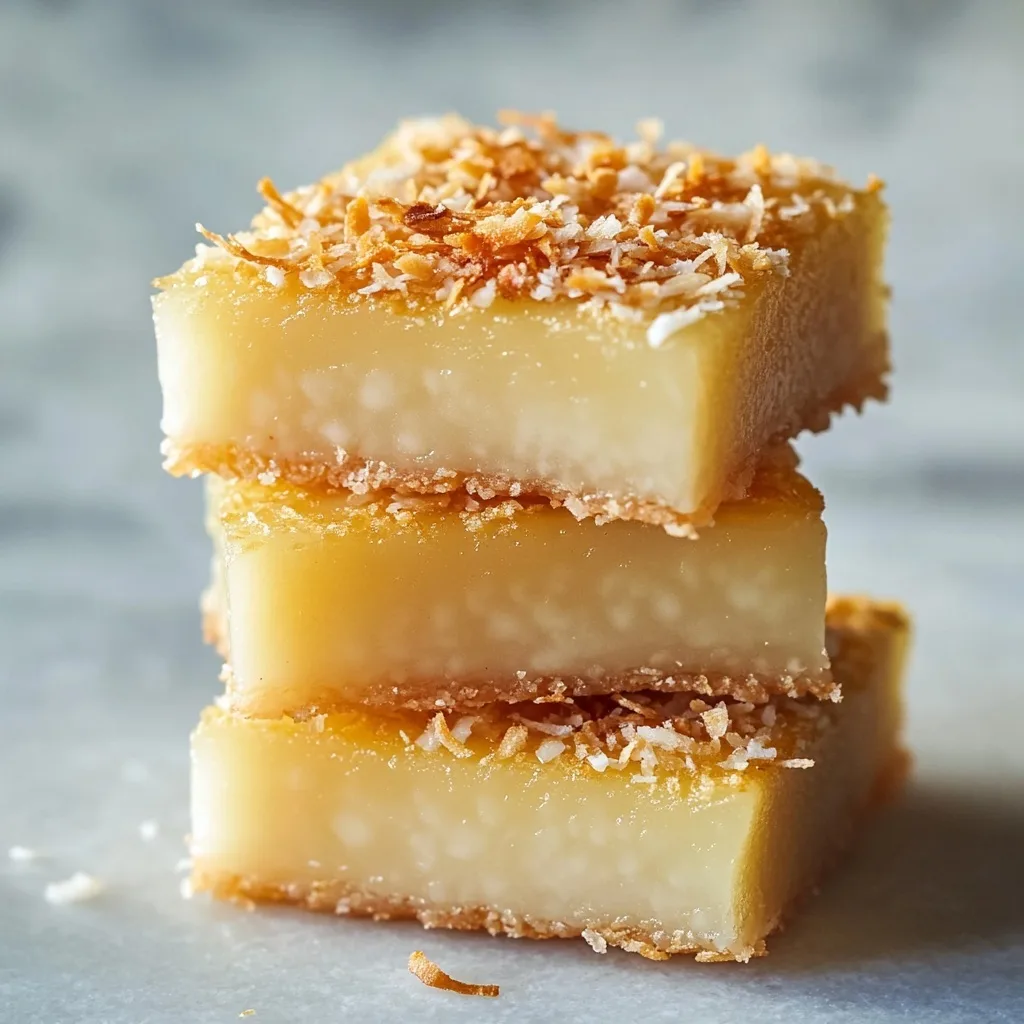
The charm of butter mochi Hawaii lies in its texture. It’s got a golden, crispy top with a chewy, gooey center—almost like a blondie met a coconut custard. That chewy bite comes from sweet rice flour, and the rich flavor comes from real butter, coconut milk, and eggs. You can taste the island in every square.
It’s easy to see why locals and visitors fall in love with Hawaiian butter mochi—it keeps well for days, travels beautifully, and brings smiles every time.
Discover great ideas like these chickpea flour cookies—another gluten-free delight with a soft bite.
The Cozy Pantry Behind Every Perfect Butter Mochi
Essential Ingredients That Define Butter Mochi Hawaii
You don’t need a fancy pantry to make butter mochi Hawaii style—you just need a few cozy essentials that bring warmth, chew, and that tropical vibe we all love.
Here’s what you’ll find in nearly every authentic Hawaiian butter mochi recipe:
| Ingredient | Why It Matters |
|---|---|
| Mochiko Flour (Sweet Rice Flour) | The heart of the chew—sticky, stretchy, and perfectly dense |
| Coconut Milk | Adds creamy richness and a hint of tropical sweetness |
| Butter (Melted) | Gives richness and golden color |
| Sugar | Sweetens and caramelizes on the edges |
| Eggs | Binds everything together and helps it bake firm |
| Baking Powder (optional) | Gives a little lift and bounce |
| Vanilla Extract | For depth and warmth |
The signature of butter mochi Hawaii is how these ingredients come together: it’s the coconut that whispers “island,” and the mochiko that gives it its soul.
Check out our chickpea chocolate chip cookies with no flour for another naturally gluten-free, pantry-friendly bake.
Swaps and Substitutes: Making It Allergy-Friendly and Still Amazing
If you’re baking for guests or family with dietary needs, don’t worry—Hawaiian butter mochi is surprisingly flexible:
- Dairy-Free? Use coconut oil or plant-based butter instead of regular butter.
- Vegan? Swap in flax eggs (1 tbsp flaxseed meal + 2.5 tbsp water per egg).
- Low Sugar? Try coconut sugar or monk fruit sweetener for a more balanced sweetness.
- No Coconut Milk? Use almond milk with a splash of coconut extract—it’s not quite the same, but still delicious.
Butter mochi doesn’t need to be fussy—it just needs a little love and a cozy oven.
Looking to better understand how these substitutions affect your health? Healthline explains the benefits of common ingredient swaps here.
Don’t miss our cottage cheese pumpkin banana bread—another simple bake with comforting flavors and smart ingredient swaps.
Bake It Like a Local – Foolproof Steps to Irresistible Butter Mochi
Sophie’s Step-by-Step Method for Butter Mochi Hawaii Perfection
PrintButter Mochi Hawaii – A Chewy Island Classic You’ll Love
This chewy, buttery, coconut-sweet Butter Mochi Hawaii is a nostalgic island dessert that’s incredibly easy to make, gluten-free, and perfect for sharing at potlucks, picnics, or cozy nights in.
- Prep Time: 10 minutes
- Cook Time: 60 minutes
- Total Time: 1 hour 10 minutes
- Yield: 16 squares
- Category: Dessert
- Method: Baking
- Cuisine: Hawaiian
- Diet: Gluten Free
Ingredients
1 box (16 oz) mochiko sweet rice flour
2 cups granulated sugar
2 tsp baking powder
½ tsp salt
4 large eggs
1 can (13.5 oz) coconut milk
1½ cups whole milk (or oat milk)
½ cup unsalted butter, melted (or plant-based)
1 tsp vanilla extract
Optional: ½ cup shredded coconut for topping
Instructions
Preheat the oven to 350°F (175°C). Lightly grease a 9×13-inch baking dish or line it with parchment paper for easy removal.
Mix the wet ingredients. In a large mixing bowl, whisk together the eggs, coconut milk, regular milk, melted butter, and vanilla extract until fully combined and smooth.
Incorporate the dry ingredients. Add mochiko flour, sugar, baking powder, and salt to the bowl. Whisk until the batter is smooth and lump-free. The consistency should be similar to pancake batter—thick but pourable.
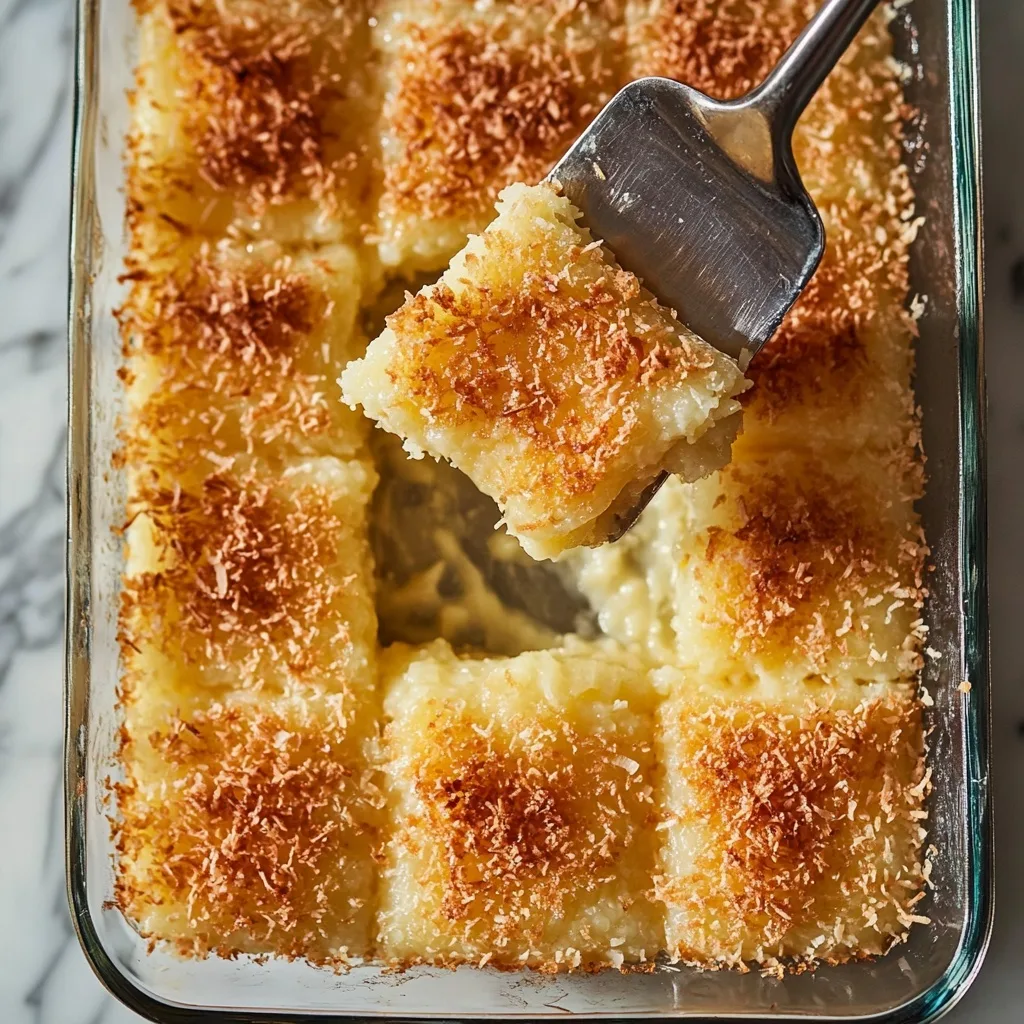
Pour the batter into the dish. Carefully pour the batter into your prepared baking dish, spreading it evenly. Optional: Sprinkle shredded coconut evenly across the top for added flavor and texture.
Bake. Place the dish in the center of the oven and bake for 60 to 70 minutes, or until the top is golden brown and the center has set. A toothpick inserted should come out mostly clean.
Cool completely. Remove from the oven and let the butter mochi cool completely in the pan. This helps it firm up and makes slicing easier.
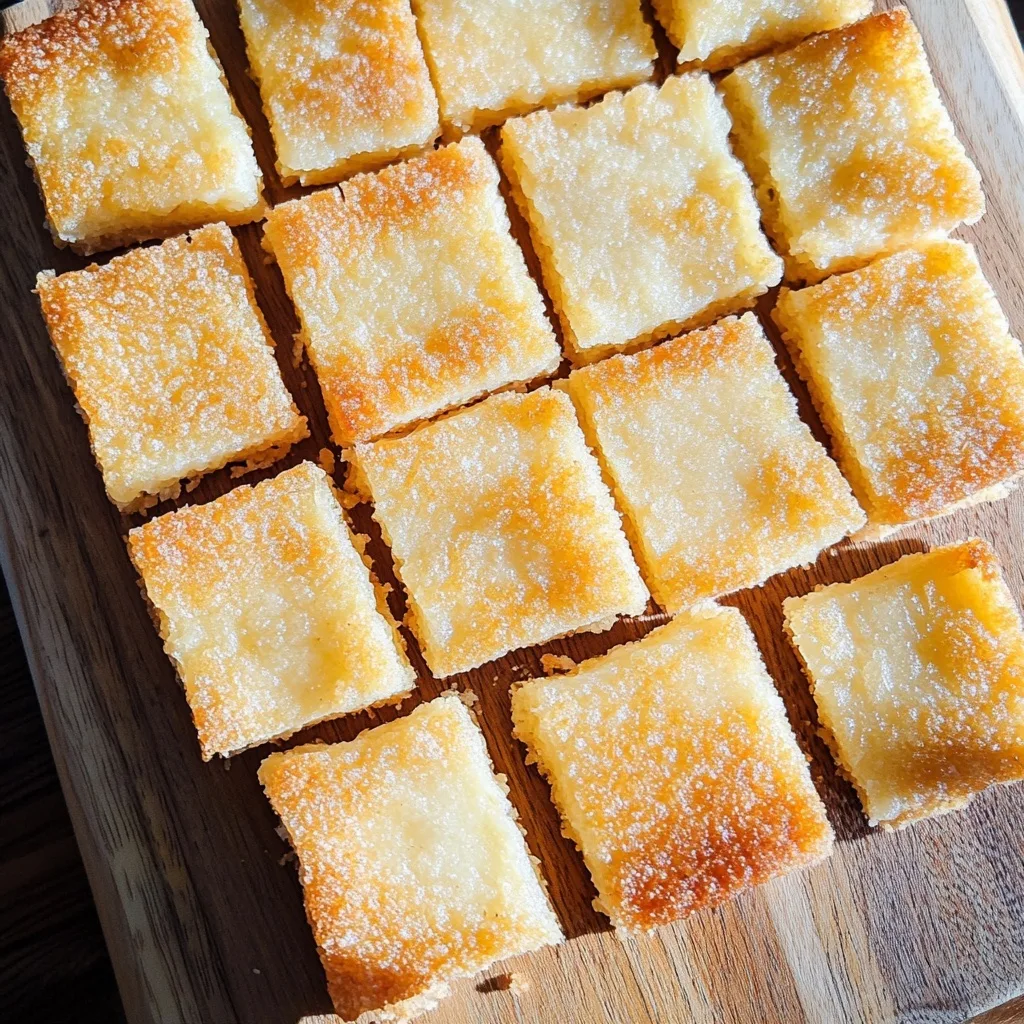
Slice and serve. Cut into 16 squares. Enjoy at room temperature or slightly warmed for the ultimate chewy, buttery treat.
Notes
Let it cool fully before slicing for clean, chewy pieces.
Stores well at room temperature for 2 days or in the fridge for 5.
Freezer-friendly: Wrap individual squares for up to 2 months.
- Use flax eggs and plant-based milk/butter to make vegan.
Looking for inspiration? Try our protein bagels made with cottage cheese—another easy-bake idea with unexpected flavor.
Common Mistakes to Avoid for That Perfect Golden Top
Even a cozy dessert like butter mochi Hawaii can go sideways without a little care. Here are a few things to watch for:
- Don’t Overmix: Stir until smooth, but don’t beat it to death. You want chewy, not rubbery.
- Don’t Undercook: If it’s still jiggly in the middle, give it more time. The top should be golden and gently puffed.
- Cool Before Cutting: Cutting too early will lead to sticky, messy edges and a crumbly texture.
Want a crispier top? Bake it uncovered, and don’t be afraid to go a few minutes longer. Sophie loves those golden edges—it’s the best part.

Creative Twists on a Classic – Let’s Get Mochi-Creative
Butter mochi is already magical on its own—but with a few playful tweaks, you can turn this island classic into something fresh, fun, and totally you. Sophie loves experimenting with new flavors, and this is one recipe that welcomes creativity with open arms.
Flavor Variations That Still Taste Like Home
Butter mochi Hawaii style is already loaded with flavor, but here are some delicious ways to remix it without losing the heart of the original.
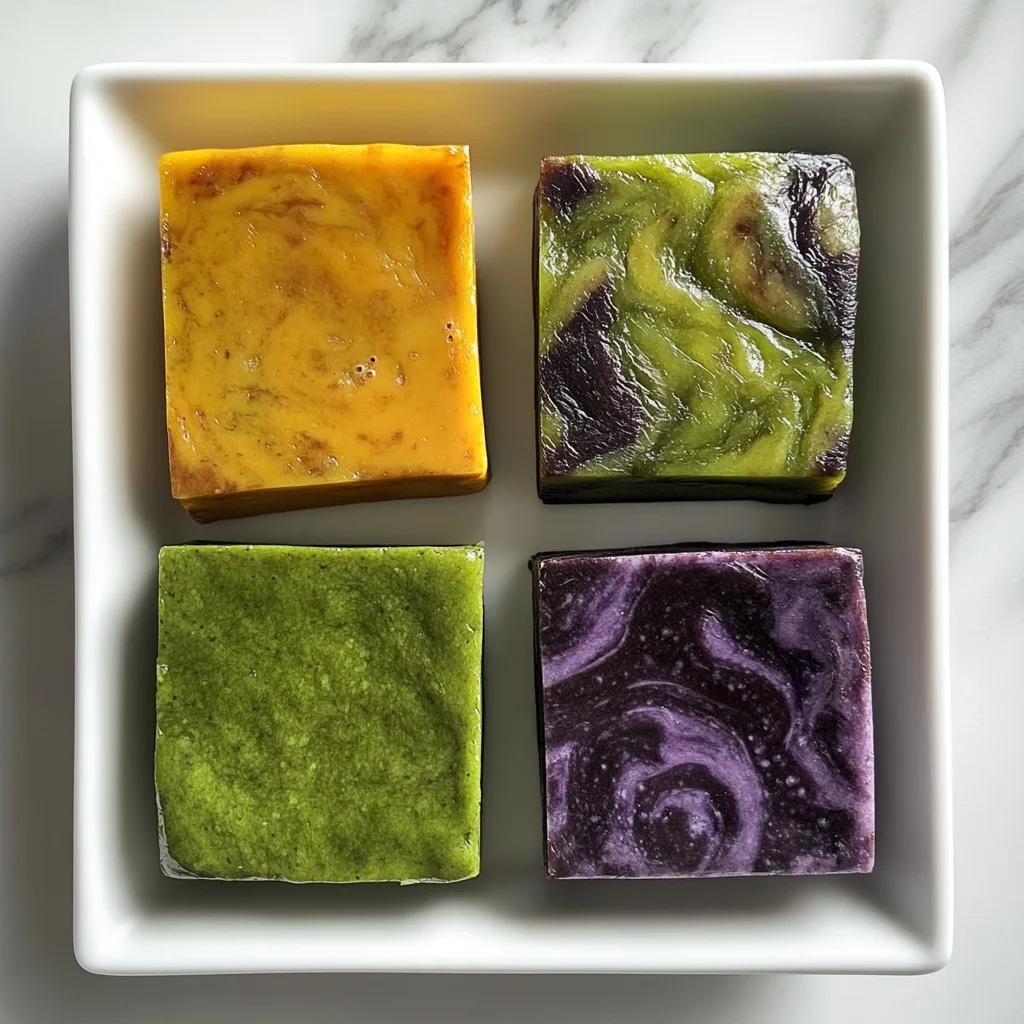
- Chocolate Butter Mochi
Add ½ cup cocoa powder to the batter for a rich, brownie-like twist. You’ll still get that chewy texture, but with deep, fudgy vibes. - Ube Butter Mochi
Add ube halaya or ube extract to give your mochi a gorgeous purple hue and a nutty, vanilla-like flavor that’s popular in Filipino-Hawaiian kitchens. - Matcha Mochi Bars
A few teaspoons of matcha powder give a subtle green tea flavor that balances the richness of the butter and coconut. - Pumpkin Spice Butter Mochi
Mix in canned pumpkin and warm spices like cinnamon, nutmeg, and clove for a fall-friendly version with a cozy, spiced aroma.Don’t miss our full pumpkin butter mochi Hawaii recipe for the perfect fall dessert with island flair. - Mochi With a Tropical Fruit Swirl
Drop spoonfuls of mango or pineapple puree into the batter and swirl gently before baking for a fruity surprise in every bite.
Looking for inspiration? Try our cottage cheese banana pudding—a fresh twist on a nostalgic favorite with a tropical vibe.
How to Turn Butter Mochi Into Bars, Bites, or Party Treats
There’s no rule that says butter mochi Hawaii has to be sliced into squares. In fact, Sophie loves turning it into cute little bites for parties or gifts.
- Mini Muffin Tin Mochi Bites
Pour the batter into greased mini muffin tins and bake for 30–35 minutes. You’ll get crispy edges all around and perfect little chewy bites. - Layer It Up
Add a layer of sweetened cream cheese or fruit jam halfway through baking for a filled version that feels extra fancy. - Butter Mochi Pops
Once cooled, slice and insert sticks into each piece. Dip in melted chocolate and sprinkle with toasted coconut—fun for kids’ parties or luaus! - Holiday Gift Version
Wrap individually in parchment, tie with twine, and attach a printable “Made with Aloha” tag. Cozy, homemade, and heartfelt.
Don’t miss our bagel cottage cheese recipes—another creative take that’s perfect for entertaining or gifting.
The beauty of butter mochi Hawaii is how it holds on to tradition while making space for innovation. It’s a dessert that says “this is home” but still invites you to play.

Keep the Magic Going – Storing, Sharing, and Gifting Butter Mochi
How to Store Butter Mochi Hawaii Style Without Losing That Chewy Charm
So you’ve made a tray of chewy, golden butter mochi Hawaii deliciousness—now what? Unlike many baked goods that dry out, butter mochi stays moist for days. That means leftovers (if you even have any) are just as tasty.
Here’s how to keep that island flavor and perfect texture going strong:
| Storage Method | Duration | Tips |
|---|---|---|
| Airtight container, room temp | 2–3 days | Keeps the edges crisp and center soft |
| Fridge (sealed) | Up to 5 days | Great for humid days, but let it sit at room temp before serving |
| Freezer (cut in pieces) | 1–2 months | Wrap individually, thaw overnight or microwave 20 secs |
To reheat: A few seconds in the microwave brings back that gooey bite, but don’t overdo it or it’ll get rubbery. You can also pop it in a toaster oven for a crisp top.
Looking for more smart kitchen ideas? Learn more about how to make banana bread with cottage cheese—a delicious, freezer-friendly option with a tropical twist.
Making Butter Mochi a Cozy Gift (That Everyone Actually Wants)
Want to give something homemade, heartfelt, and way better than a candle? Butter mochi Hawaii makes a perfect edible gift that feels both thoughtful and nostalgic.
Here’s how Sophie loves to gift it:
- Wrap It Pretty: Cut into squares, wrap in parchment or wax paper, tie with jute or baker’s twine.
- Add a Handwritten Note: “Made with Aloha” or “Soft. Sweet. Shared.” adds a personal touch.
- Bundle It: Pair with a bag of Kona coffee or a little jar of coconut jam for a full island-inspired gift box.
This is a dessert that says “I care” without trying too hard. It’s easy to make, share, and customize for holidays, birthdays, or cozy thank-you moments.
Don’t miss our gluten-free Japanese milk bread—another giftable, soft-baked favorite that feels extra special.
Butter mochi isn’t just food—it’s feeling. It’s the buttery sweetness of a shared table, the comfort of chewy bites on a rainy day, and the joy of gifting something made with your own hands. Whether you’re baking for a crowd or just for yourself, butter mochi Hawaii delivers cozy, coconut-flavored happiness every single time.

Frequently Asked Questions About Butter Mochi Hawaii
What is the difference between butter mochi and Japanese mochi?
Butter mochi is baked and made with mochiko flour, butter, eggs, and coconut milk—resulting in a chewy, cake-like texture. Japanese mochi is traditionally steamed and pounded from glutinous rice, giving it a stickier, stretchier texture.
Can I make butter mochi without coconut milk?
Yes! While coconut milk gives butter mochi Hawaii its iconic tropical flavor, you can substitute with whole milk or almond milk and a splash of coconut extract for a similar feel.
Is butter mochi gluten-free by default?
It is! Butter mochi is made with sweet rice flour (mochiko), which contains no gluten. Just double-check that other ingredients (like baking powder) are gluten-free too.
How long does homemade butter mochi last?
At room temperature, it stays fresh for 2–3 days. Stored in the fridge, it keeps for up to 5 days. You can also freeze slices for up to 2 months.
Can you freeze butter mochi for later?
Absolutely. Wrap individual pieces in parchment or plastic wrap, store in an airtight bag or container, and freeze. Reheat gently in the microwave or toaster oven.
What’s the best type of flour for butter mochi?
Mochiko flour (sweet rice flour) is the key ingredient. Brands like Koda Farms Blue Star Mochiko are widely used in traditional butter mochi Hawaii recipes.
Conclusion: Why Butter Mochi Hawaii Is the Dessert That Feels Like a Hug
When a dessert brings together culture, comfort, creativity, and coconut—it’s something worth celebrating. Butter mochi Hawaii is more than just a treat; it’s a slice of island life, baked with love and meant to be shared.
Whether you stick with the traditional recipe or add your own twist, butter mochi has a way of showing up just when you need something warm, chewy, and unforgettable. So preheat that oven, grab the mochiko, and bake your own piece of paradise.
Don’t miss our soft, chewy cottage cheese banana bread (low calorie)—it’s another reader favorite that’s just as cozy.

